User Story:
As a merchant, when i receive a PAX Device i want to signup via ISO Activation Code, so that i could be linked to my ISO Partner and i would not be billed during the onboarding and afterworth As an ISO Partner, I want to configure the device and preinstall apps, entering the ISO Activation code from the coupon, so that i could link device to my ISO Partner account and billing.Interactive Prototypes:
Activation Codes Signup Flow Activation Codes Link Device to Existing Account FlowHierarchy:
- Super admin - Has multiple activation codes for multiple partners
- Partner - has multiple activation codes only for his partnership
- Public Brand 1
- Account 1
- Public Brand 2
- Account 1 - has only one activation code
- Activation Code - has multiple devices
- Device 1 - has only one activation code
- Device 2
- Activation Code - has multiple devices
- Account 2 - has only one activation code
- Activation Code - has multiple devices
- Device 1
- Device 2
- Activation Code - has multiple devices
- Account 1 - has only one activation code
- Public Brand 1
- Partner - has multiple activation codes only for his partnership
Base Success Flow Chart Diagram:
Base Success Flow and Endpoints:
- Enter Activation code and Register account
/pos/{posSystemId}/integrations/account/registration - Send Activation Code by email
/pos/{posSystemId}/activationCode/{activationCode}/send - Get Activation Code status to login user after account creation
/pos/{posSystemId}/activationCode/{activationCode}/status - Get available locations list
/pos/{posSystemId}/activationCode/{activationCode}/locations - Use activation code to link terminal to account
/pos/{posSystemId}/activationCode/{activationCode}/use
Base Full Flow (Share Activation code with onboarding via Email):
-
Super/Partner Admin Creates Activation code
-
Opens Activation Codes List
-
Clicks Create Single Activation Code
-
System opens the Single Activation Code Creation modal
-
Super admin Fills all fields
- Enters name
- Selects Partner via the autocomplete
- Selects No Brand option
- Selects Pricing Plan
- Selects Payment Party
- Partner - Onboarding without Payment step
- Account Owner - Onboarding with payment step
- Super Admin Confirms creation
- System creates Activation Code and shows it in the Activation codes list
-
Opens Activation Codes List
-
Super admin clicks selects the send option from the grid context menu
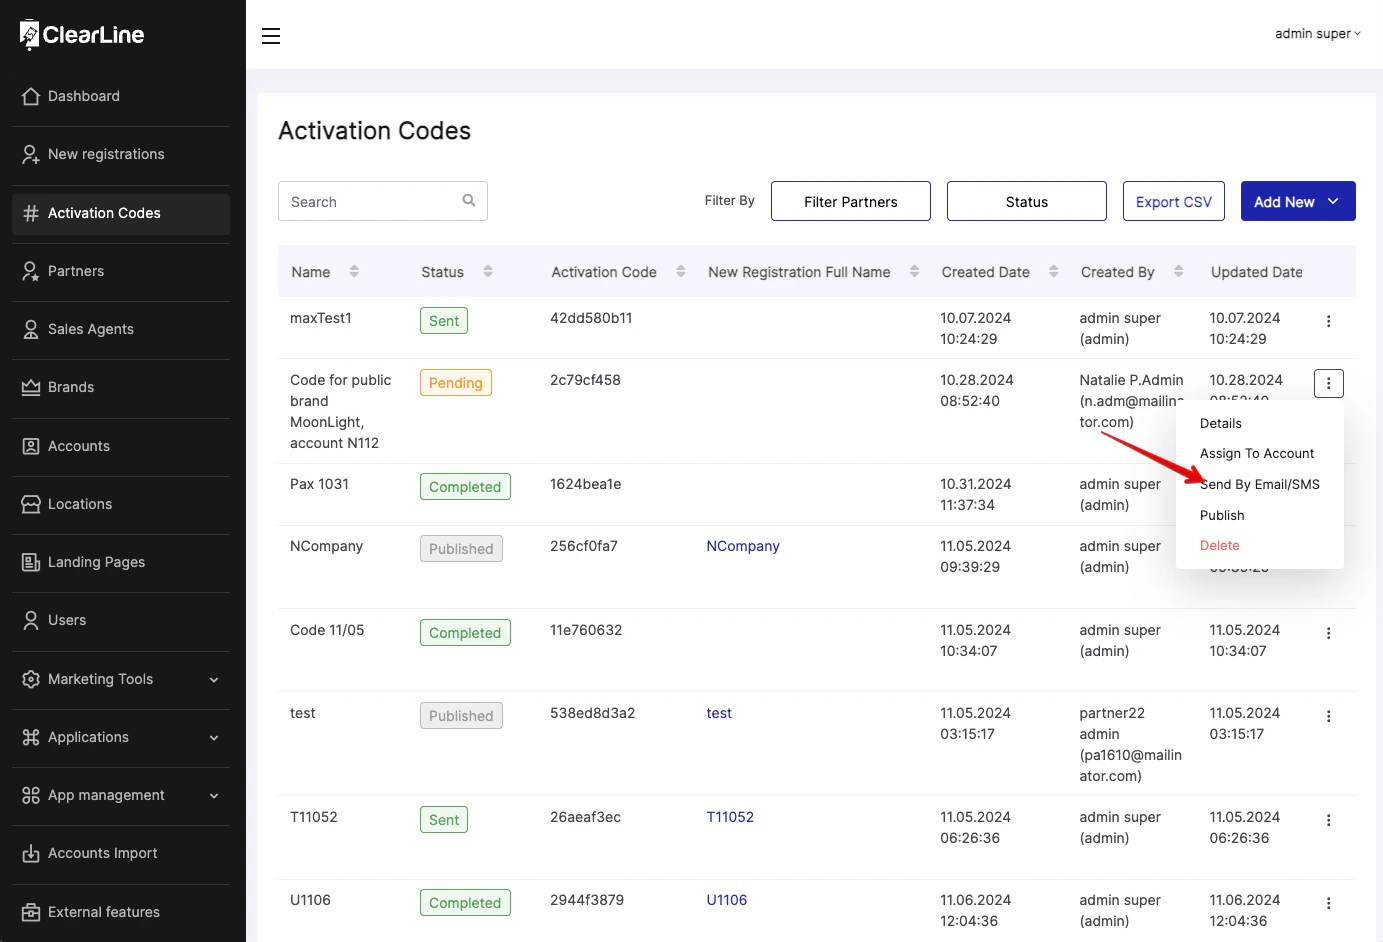
-
System opens the Send modal
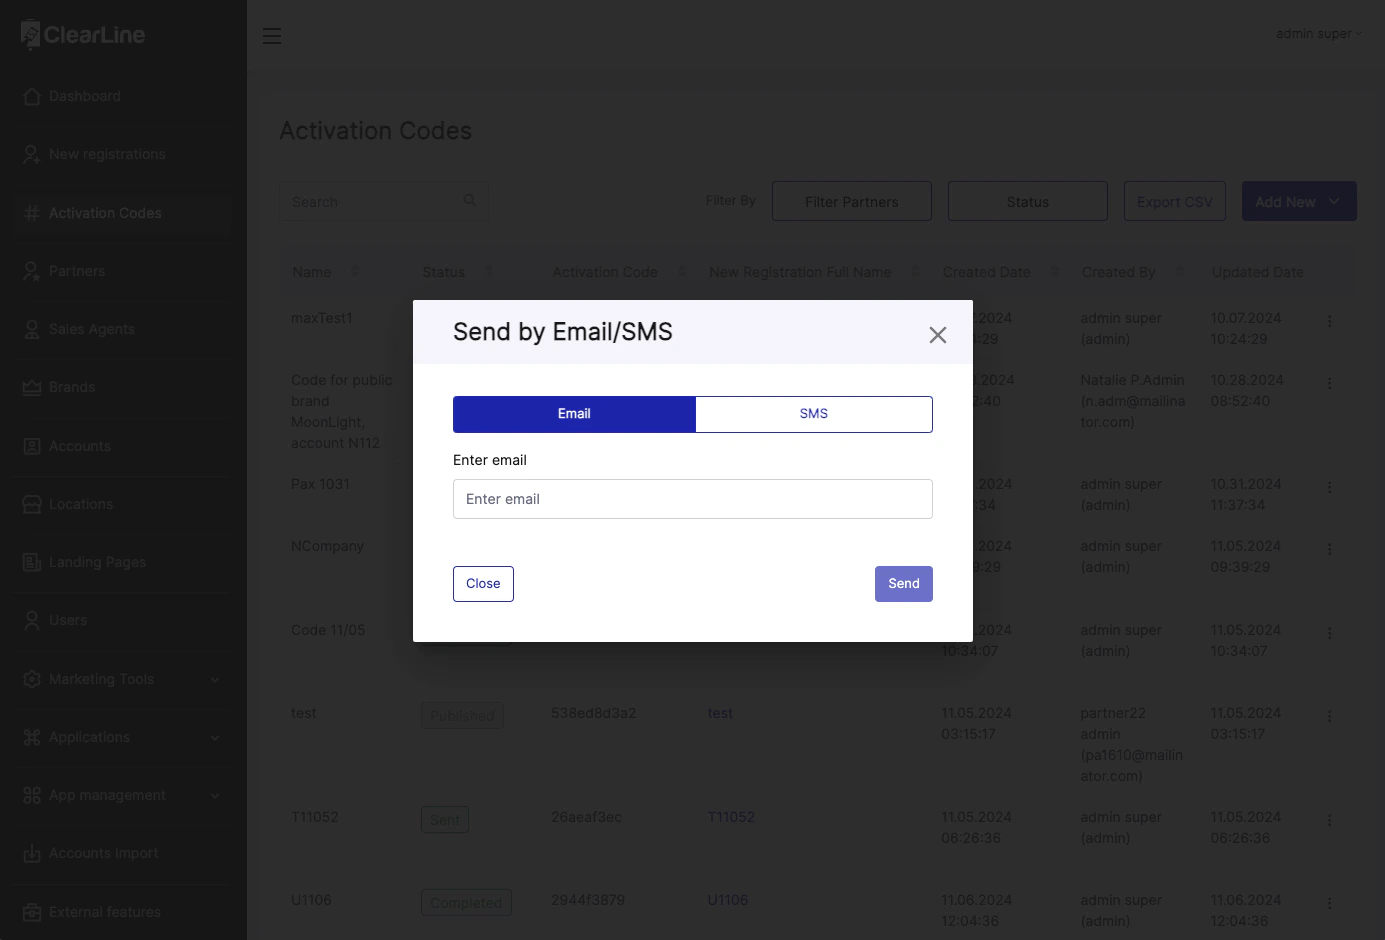
- Super Admin selects the Email option, enters email and clicks send
- System sends the Activation Code and New registration Url to the entered email
- Merchant Starts PAX ClearLine app
-
App shows the Activation Code screen
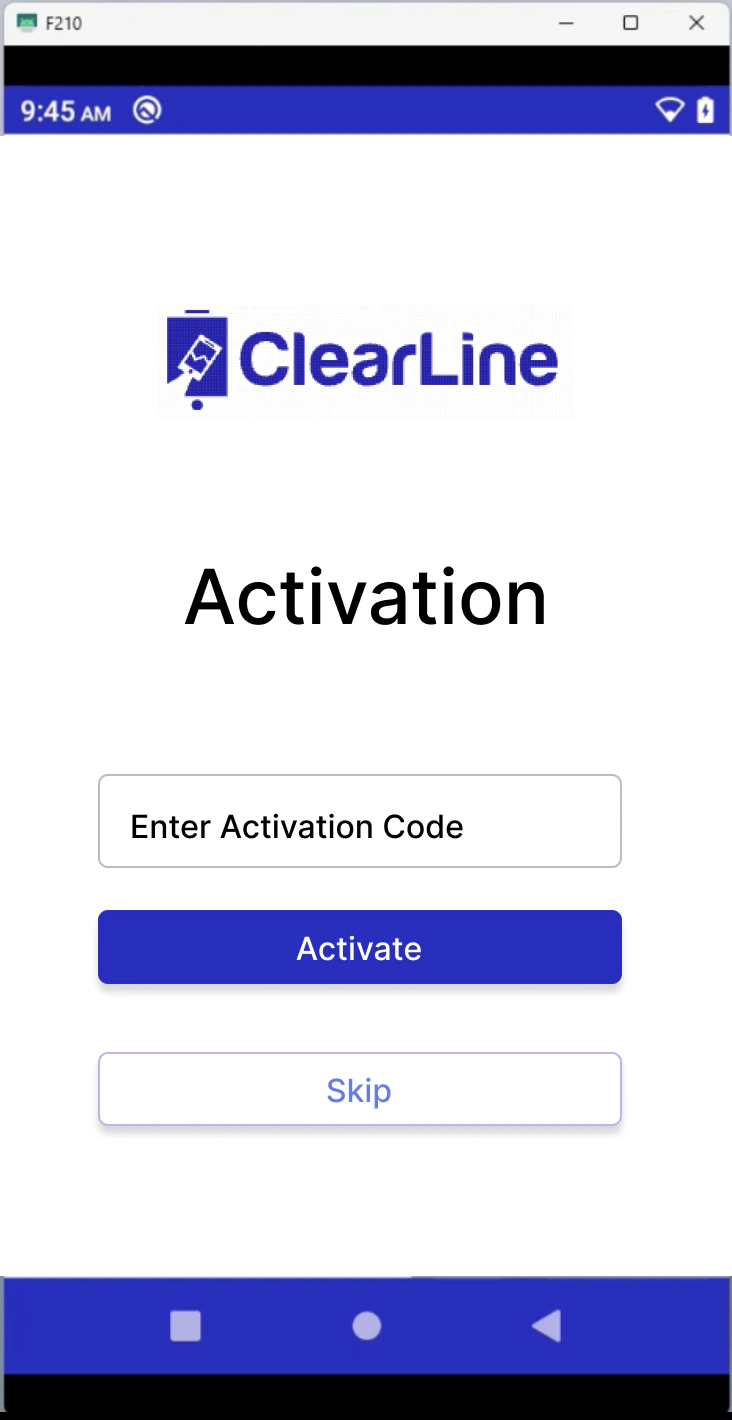
- Merchant Enters the Activation code
- App calls clearline API https://apitest.clearline.me/pos/{posSystemId}/integrations/account/registration
- If the Activation code is valid
- ClearLine API returns code 200 and Registration URL to Android APP
-
If there is no account, ClearLine generates New registration and short url
-
App opens a QR Code and Email input screen
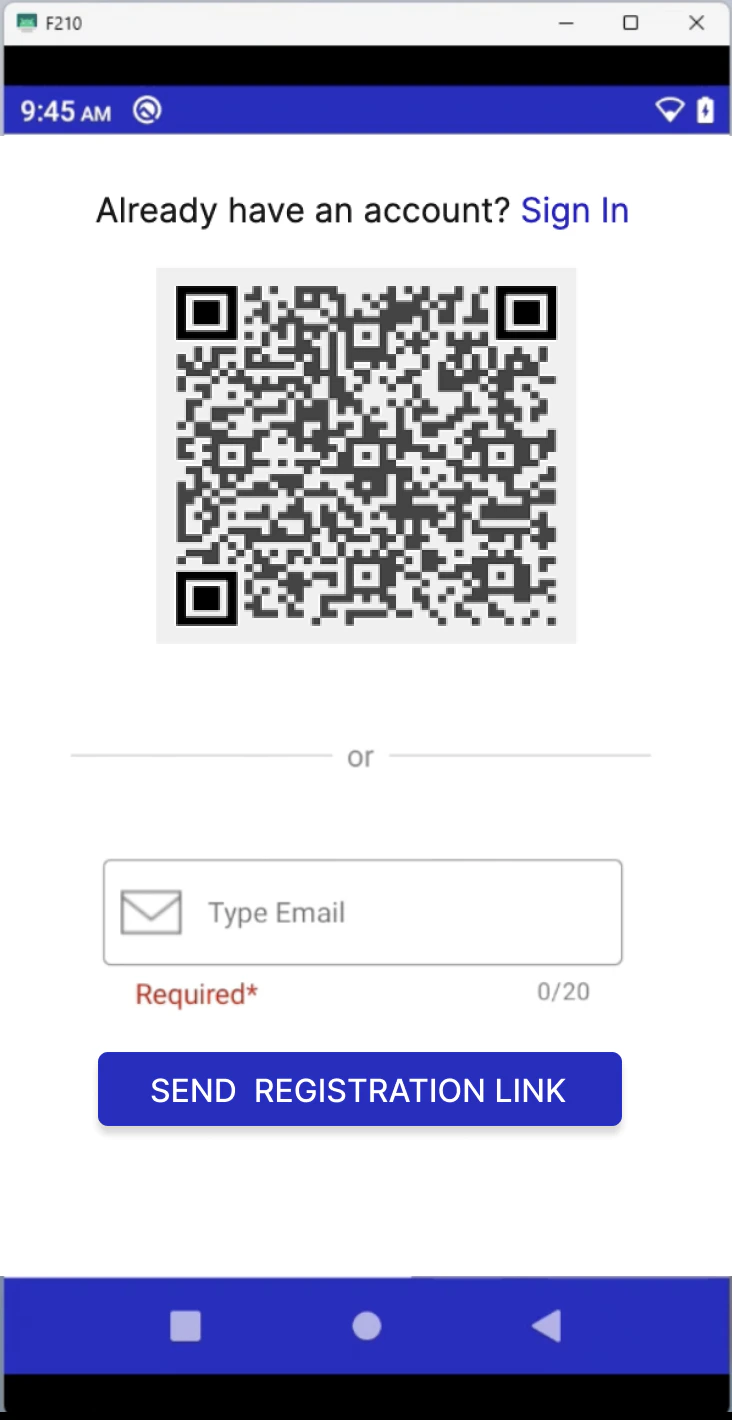
-
Merchant Scans QR Code or enters email and clicks the New registration URL on his own device
- If Merchant Scans QR code - System opens Short URL
- If Merchant Enters Email
-
App Calls Send Endpoint
https://apitest.clearline.me/pos/{posSystemId}/activationCode/{activationCode}/send
- Endpoint should have system account authorization
- App should call the Client Credentials Authorization(should be included in PAX tasks)
- ClearLine API sends an email using new template that will be a copy of the Send template but saying “Dear Merchant” instead of “Dear (customer name)” ❓⚠️
-
App Calls Send Endpoint
https://apitest.clearline.me/pos/{posSystemId}/activationCode/{activationCode}/send
- Merchant opens registration URL on his personal device
- System opens the Signup screen (without social networks)
- User enters his details and creates an account
- User proceeds to onboarding
-
System redirects user from mobile device to PC Onboarding
- If payment party Partner - Onboarding without Payment step
- If payment party Account Owner - Onboarding with payment step
- User Completes the onboarding
-
PAX App calls “Get Activation Code Registration Status” endpoint each 15 seconds
https://apitest.clearline.m - ClearLine App authorizes Merchant to the App
-
App opens a QR Code and Email input screen
-
If the account was already created by acitvation code or New registration url, Then the device should be added to account and user is logged in as device.
-
App Requests Locations of the existing account
https://apitest.clearline.me/swagger/index.html#/PosActivationCode/PosActivationCode_Locations -
App shows Select location and Serial number Screen/Modal to select existing location
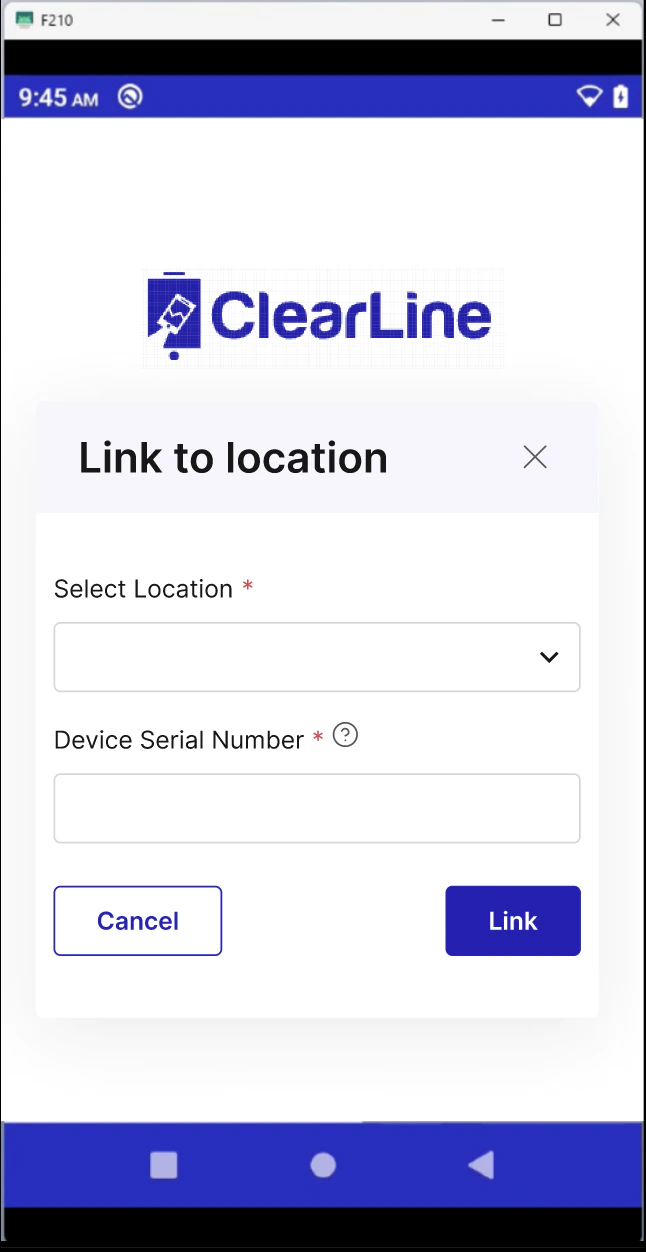
- Select Existing Location Dropdown with autocomplete
- Enter Device Serial Number input (Shown only if the App failed to get the Serial number)
- Cancel, Select buttons
- Merchant Selects locations and enters Device Serial Number
-
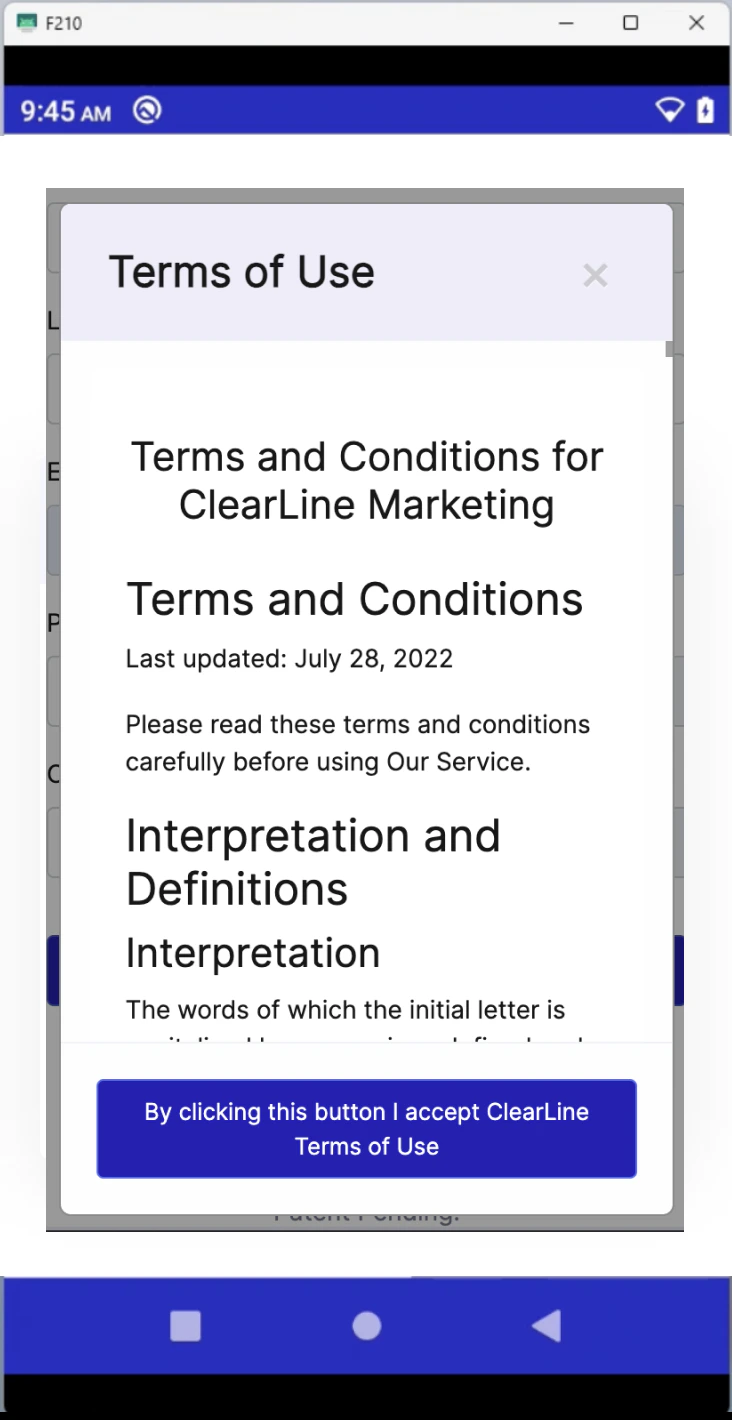
Merchant Accepts Terms of Use
-
Application calls the Activation code Usage endpoint
https://apitest.clearline.me/pos/{posSystemId}/activationCode/{activationCode}/use- Request data:
- Activation Code, (Required)
- LocationID, (Required)
- TerminalID/Serial number (Required)
- AcceptedTermsOfUse (required)
- Request data:
- ClearLine API creates new terminal with Serial Number of the Device
- ClearLine API Links Terminal(device) to Activation Code
-
If Merchant has the QR Code screen opened
- Merchant clicks the Validate button
- App shows the select Location and Serial number modal
- Merchant selects location and enters serial number
-
If Merchant has closed the QR Code screen
- Merchant Enters Activation Code
- Merchant Selects location and Enters Device Serial number
-
App Requests Locations of the existing account
- Application Automatically Authorizes the Device to the CMC Portal
- Application saves the Activation code to some Androind secure storage